7 Mistakes You’re Making with Brake Repair (and How to Fix Them)
Picture this: You’re cruising down I-35, heading back into Pauls Valley after a long day. The sun is setting over the Oklahoma plains, and everything feels right: until you have to slow down for the exit. You press the brake pedal, and instead of a smooth, confident stop, you get a high-pitched squeal that makes everyone in the neighboring lane look your way. Or worse, the pedal feels “squishy,” like you’re stepping on a marshmallow.
We’ve all been there. Brakes are arguably the most critical safety component of your vehicle, yet they are often the most misunderstood. When it comes to brake repair in Pauls Valley, many drivers try to take the DIY route or visit a shop that cuts corners to save a few bucks. Unfortunately, small mistakes during a brake job can lead to big bills: and dangerous situations: down the road.
At MNS Auto & Tire, we believe an informed driver is a safe driver. Here are the seven most common mistakes people make with brake repair and, more importantly, how to fix them before they compromise your safety.
1. The “Pad Slap”: Replacing Pads Without Inspecting Rotors
One of the most frequent errors we see is the “pad slap.” This is when a person simply pulls out the old, worn-down brake pads and slides in a new set without doing anything to the rotors (the metal discs the pads grip to stop the car).
The Problem: Your rotors live a hard life. They deal with immense heat and friction. Over time, they develop grooves, thin spots, or “warping” (technically known as lateral runout). If you put smooth, flat new pads onto a grooved or uneven rotor, the pads won’t make full contact. This leads to reduced stopping power, annoying vibrations, and premature wear on your brand-new parts.
How to Fix It: Always have your rotors measured and inspected. If they are thick enough and in decent shape, they should be resurfaced (turned) to create a fresh, flat “cross-hatch” pattern. If they are below the manufacturer’s minimum thickness, they must be replaced. You can learn more about why skipping this step is risky in our post on the hidden dangers of worn-out brakes.
2. Letting the Caliper Hang by the Hose
If you’re working on your own brakes or watching a buddy do it, keep a close eye on the brake caliper once it’s unbolted. The caliper is the heavy metal “clamp” that holds the pads.
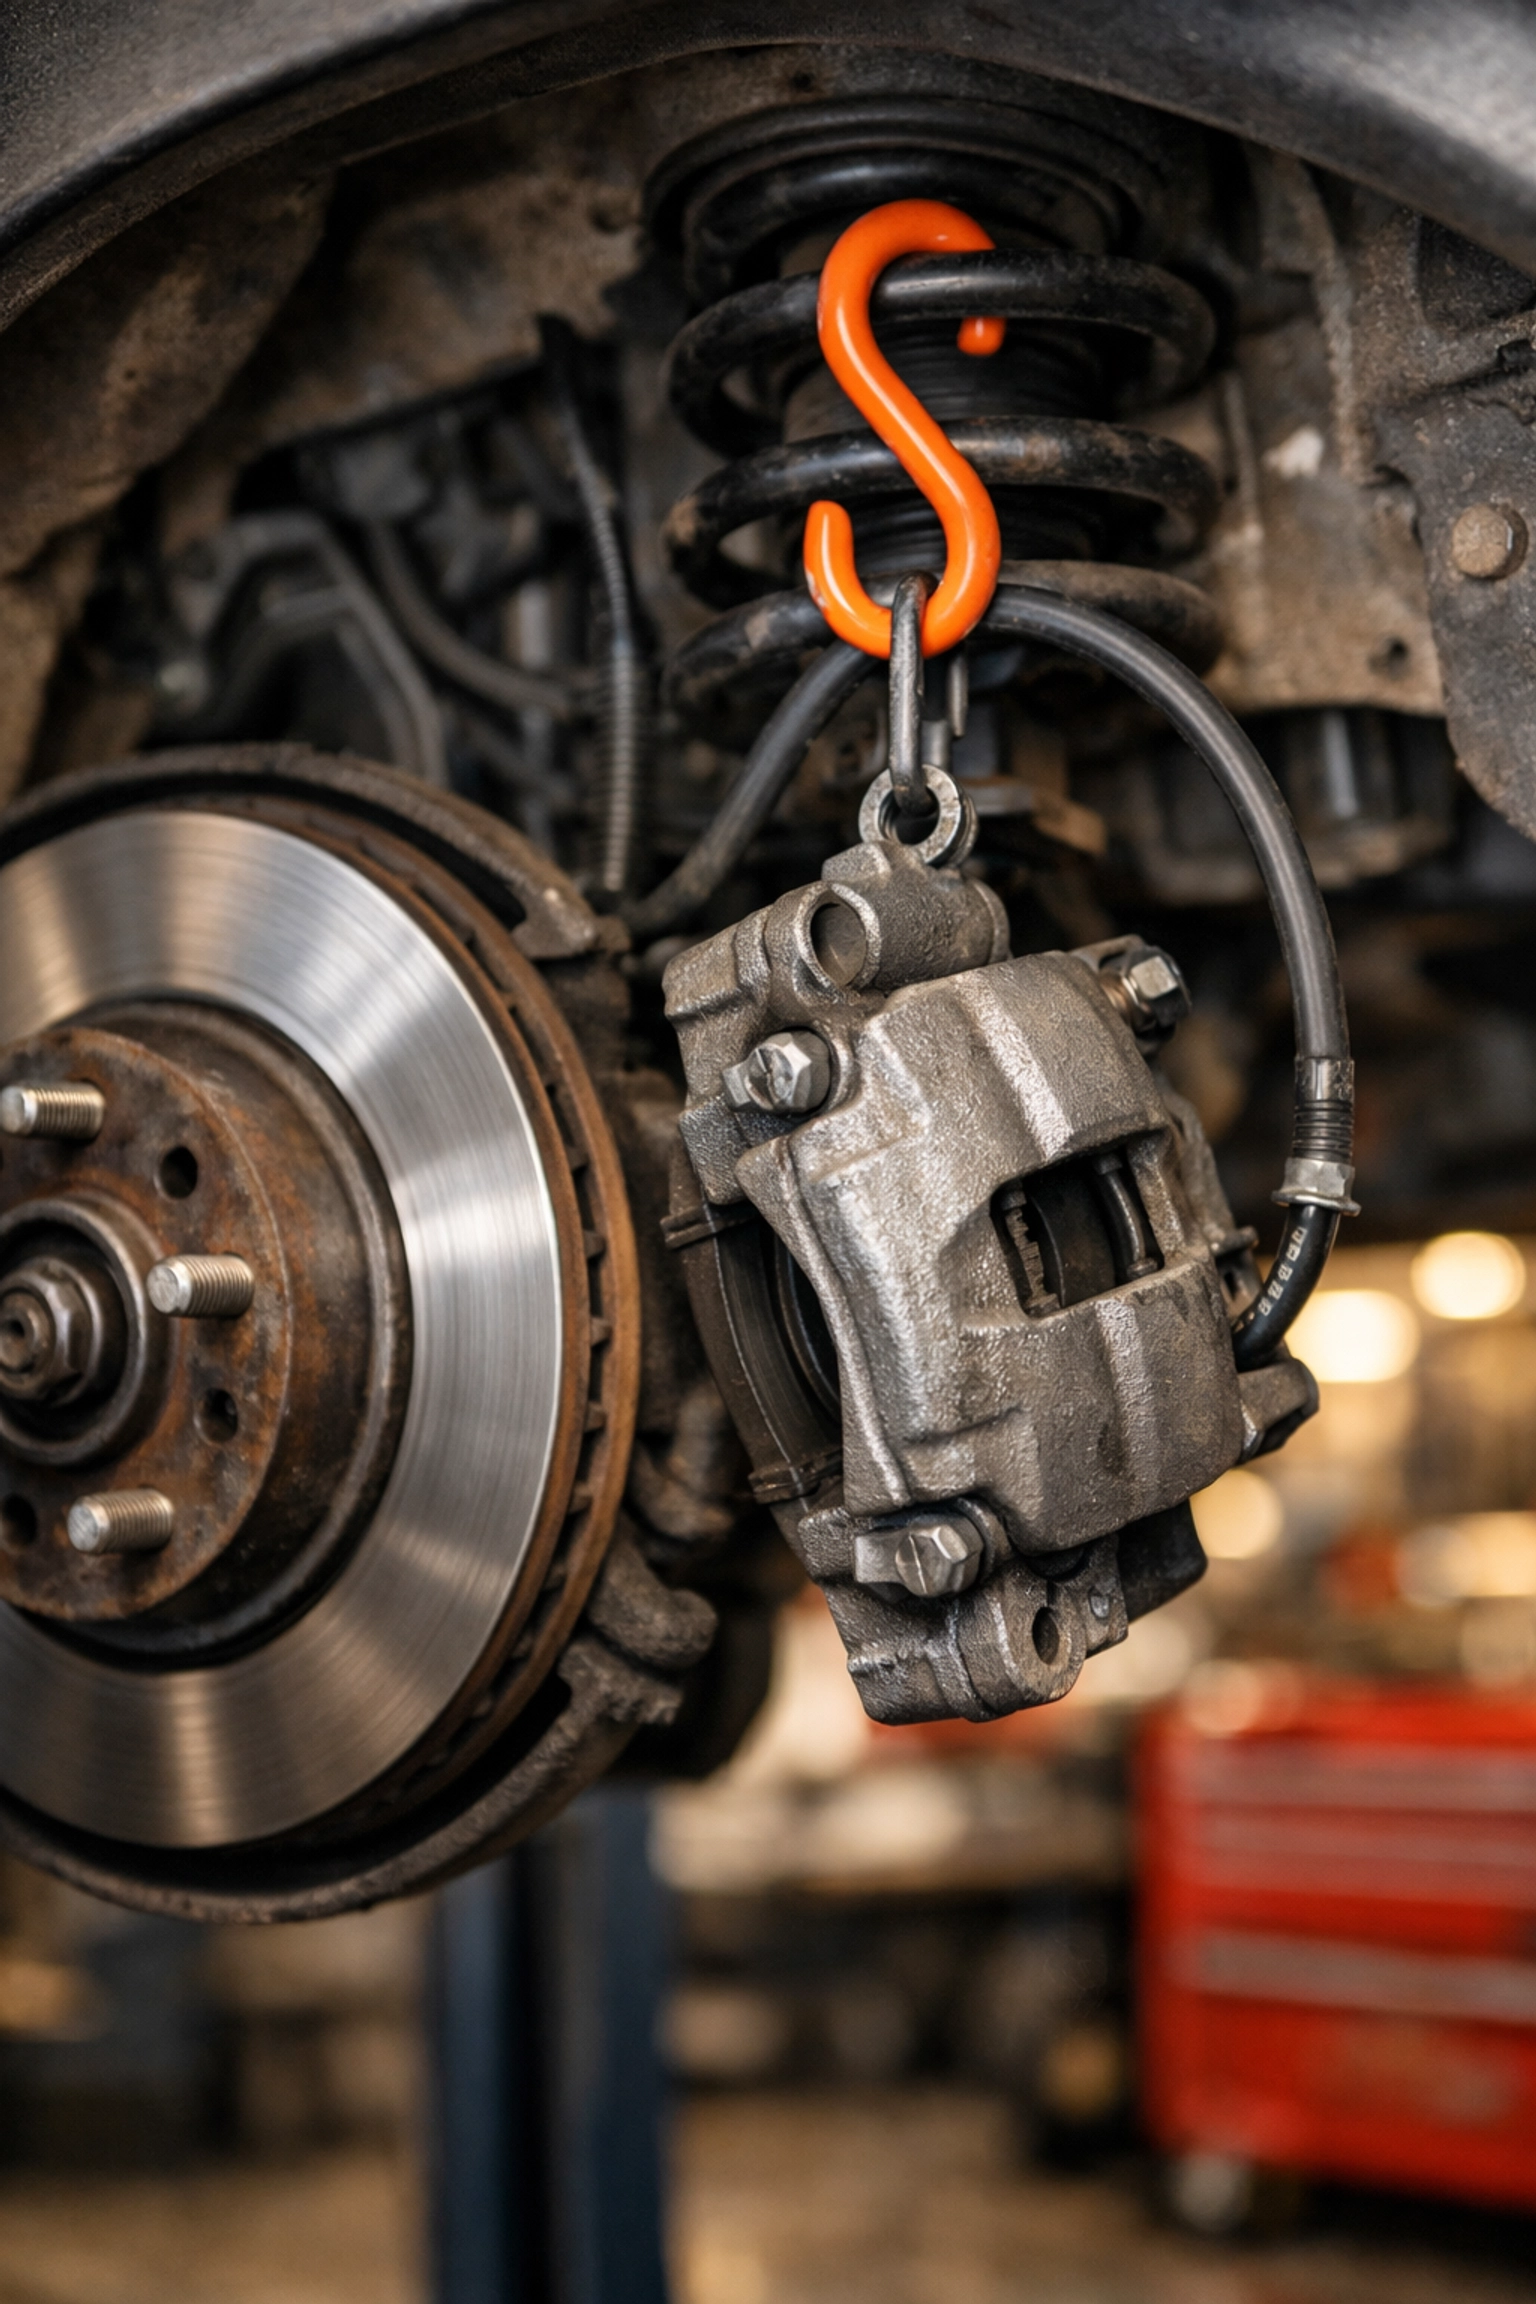
The Problem: A common rookie mistake is letting the heavy caliper dangle by the rubber brake hose while changing the pads. This puts immense strain on the internal structure of the hose. While it might look fine on the outside, the inner lining can tear or collapse. This can create a “check valve” effect where brake fluid can go into the caliper but can’t flow back out, causing your brakes to “drag” or lock up while you’re driving.
How to Fix It: Use a simple piece of heavy wire, a bungee cord, or a dedicated “S-hook” to hang the caliper from the suspension coil spring. Never let the hose support the weight of the metal.
3. Forgetting to Bleed the Brake System
Have you ever pressed your brake pedal and felt like it went almost to the floor before the car started slowing down? That’s often caused by air in the system.
The Problem: Whenever the brake system is opened: whether you’re replacing a caliper or a hose: air gets in. Unlike brake fluid, air is compressible. When you step on the pedal, the force goes into squishing the air bubbles instead of moving the brake pads. This results in a “spongy” pedal and significantly increased stopping distances.
How to Fix It: Proper automotive repair in Pauls Valley always includes a full system bleed. This involves pumping fresh fluid through the lines until every last bubble of air is purged. In the humid Oklahoma summers, brake fluid can also absorb moisture, making a fluid flush even more important to prevent internal corrosion.
4. Neglecting the Caliper Slide Pins
Brake pads need to move freely to work correctly. Most modern cars use “floating” calipers that move back and forth on steel slide pins.
The Problem: These pins are protected by small rubber boots and lubricated with grease. Over time, the grease can dry out or the boots can tear, allowing Oklahoma red dirt and moisture to get inside. When the pins seize up, the caliper can’t move. This causes one pad to wear down to the metal while the other stays looking brand new, and it can cause your car to pull to one side when braking.
How to Fix It: Every time the brakes are serviced, the slide pins should be removed, cleaned, and relubricated with high-temperature silicone brake grease. If the rubber boots are cracked, replace them immediately to keep the road grime out.
5. Overlooking the Condition of the Brake Fluid
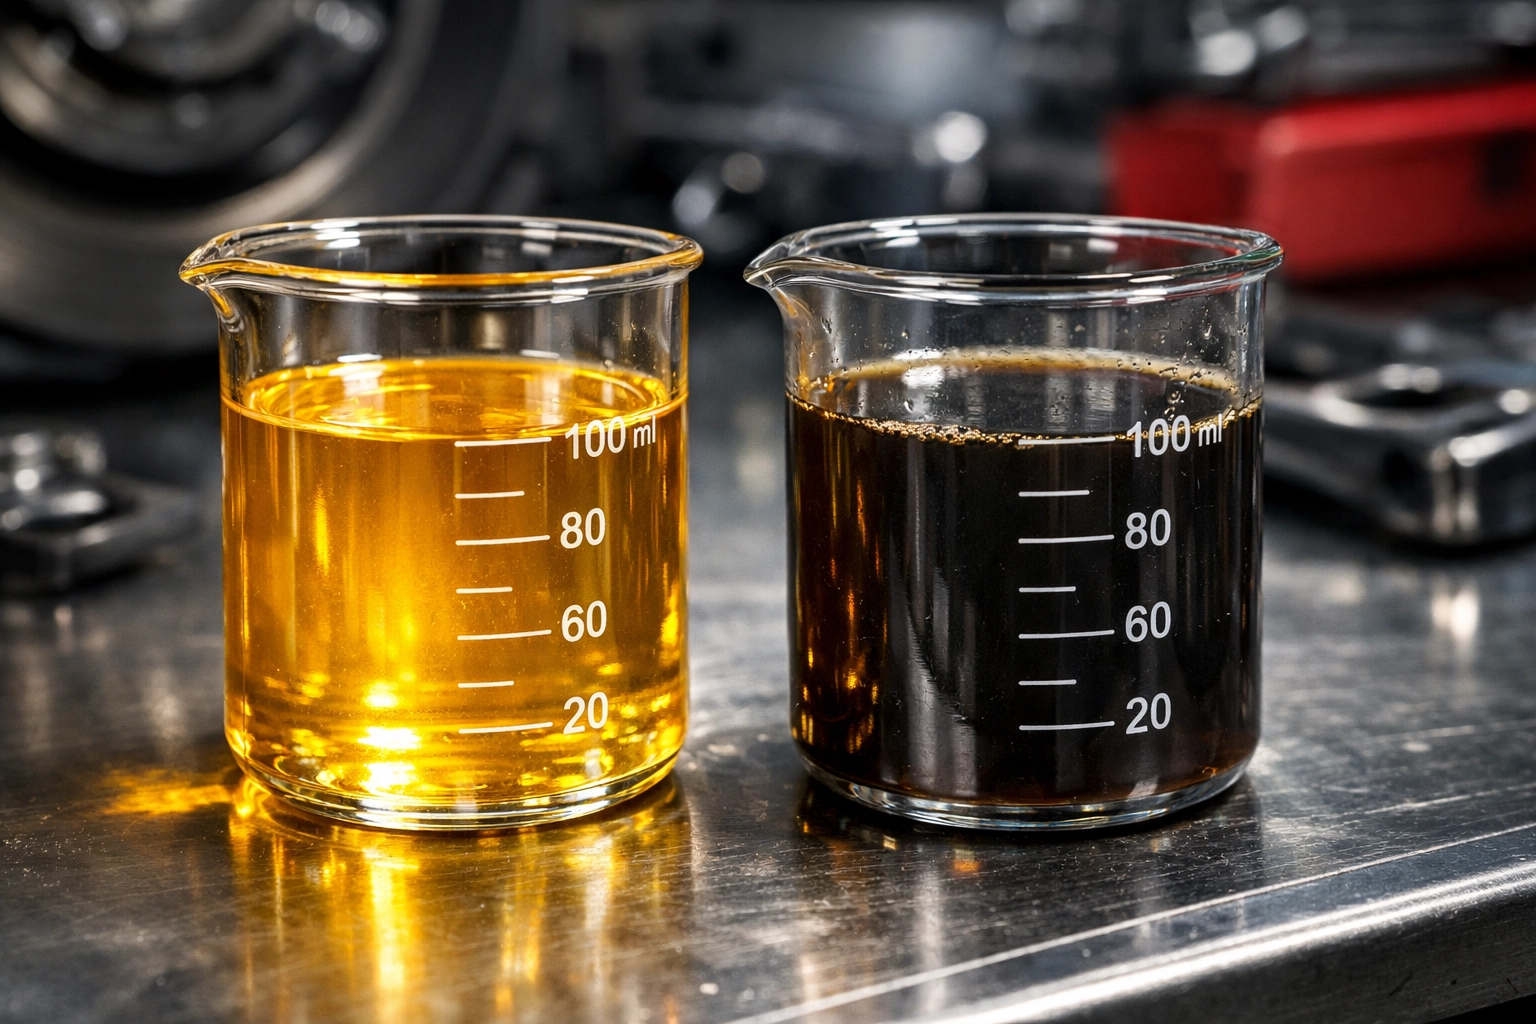
Many drivers think brake fluid lasts forever. It doesn’t. Brake fluid is “hygroscopic,” which is a fancy way of saying it acts like a sponge for moisture.
The Problem: As brake fluid absorbs water from the air, its boiling point drops. During heavy braking: like if you’re hauling a trailer or driving through hilly terrain: the fluid can actually boil, turning into gas and causing total brake failure. Furthermore, moisture leads to rust inside your expensive ABS (Anti-lock Braking System) components.
How to Fix It: We recommend testing your brake fluid during your regular vehicle inspections. Most manufacturers suggest a full flush every two to three years to keep the system clean and dry.
6. Incorrect Pad Installation (Inner vs. Outer)
It sounds simple, but you’d be surprised how often brake pads are installed backward or in the wrong position.
The Problem: Many brake pad sets are directional or have specific “inner” and “outer” pads. The inner pad often has a small metal “wear indicator” tab that chirps when the pads get low. If you swap them, that indicator won’t work, or the pad might not sit flush against the caliper piston. We’ve even seen DIYers install pads with the friction material facing away from the rotor: metal on metal from day one!
How to Fix It: Always compare the new pads to the old ones before installation. Ensure the friction material is facing the rotor and that any clips or shims are seated perfectly. If something feels like it’s being forced into place, something is likely wrong.
7. Skipping the “Bedding-In” Process
You’ve finished the repair, the wheels are back on, and you’re ready to go. But wait: you can’t just drive like normal immediately.
The Problem: New pads and rotors need to be “mated” to each other through a process called “bedding” or “burnishing.” If you go out and perform a high-speed emergency stop right away, you can cause “glazing,” where the friction material gets too hot too fast and develops a hard, slick surface that doesn’t grip well.
How to Fix It: Find a quiet road in Pauls Valley and perform a series of moderate stops (from about 45 mph down to 10 mph) without coming to a complete stop in between. This allows the heat to build up gradually and transfers a thin layer of pad material onto the rotor.

Real-Life Scenario: The “Cheap” Fix That Cost More
We recently had a customer come into MNS Auto & Tire because their car was shaking violently every time they hit the brakes. They had just “fixed” the brakes themselves two weeks prior. Upon inspection, we found they had done a “pad slap” on extremely thin rotors and forgot to lubricate the slide pins.
The result? The excessive heat from the thin rotors caused the dry slide pins to seize, which then caused the new pads to wear out in less than 500 miles. What could have been a standard maintenance job turned into a full replacement of pads, rotors, and calipers. This is why getting honest service from the start is so important for your wallet.
When to Call the Professionals
Brake repair isn’t just about making the car stop; it’s about making it stop every single time, regardless of the conditions. While some maintenance can be done at home, the complexity of modern braking systems: including electronic parking brakes and ABS sensors: means that expert intervention is often the safest bet.
Are you noticing:
- A grinding or squealing noise?
- A vibration in the steering wheel when braking?
- The brake warning light on your dashboard?
- The car pulling to one side?
If so, don’t wait. These issues don’t fix themselves; they only get more expensive. Whether you need a simple inspection or a full brake overhaul, our team at MNS Auto & Tire is here to provide the reliable car repairs Pauls Valley drivers trust.
Drive with confidence knowing your vehicle was serviced by experts who care about your safety as much as you do. Contact us today to schedule your brake inspection!